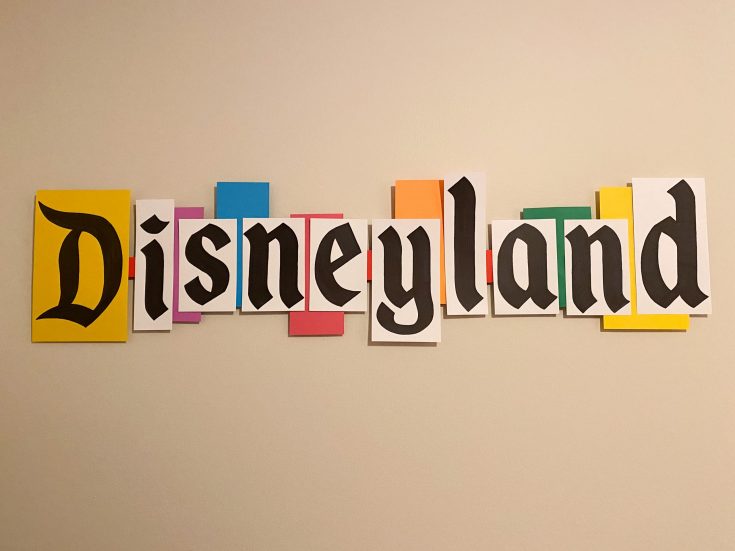
DIY Disneyland Marquee Sign
This homemade Disneyland Vintage Marquee will add a little bit of the happiest place on earth to any room. With a handful of supplies and a little bit of time, you will have this magical piece of decor that your friends and family will love.

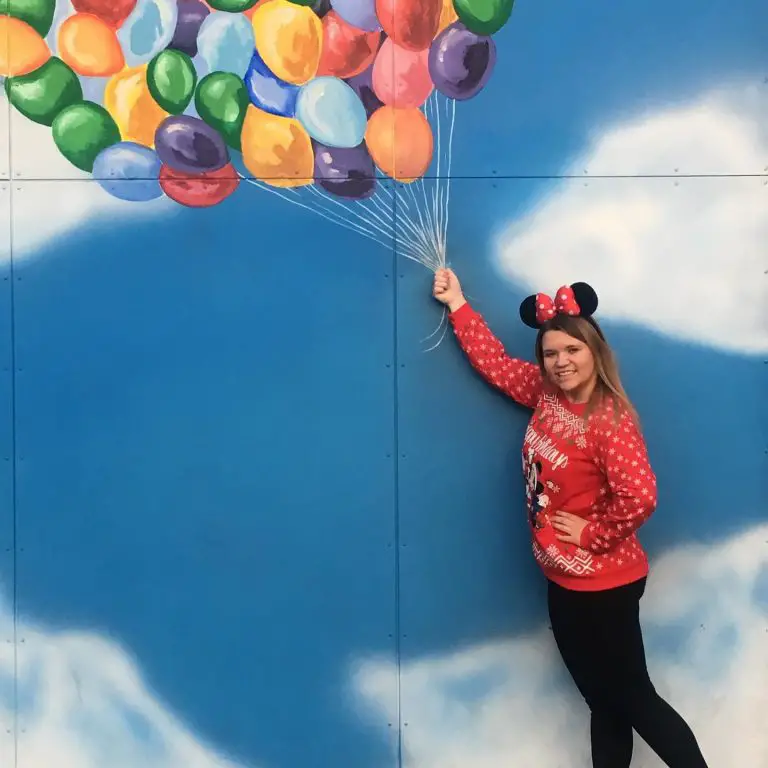
I have been a fan of vintage Disneyland decor for years, and I wanted to bring a little magic to my space.
It’s hard to think of Disneyland without thinking of where it came from. In the early 1950’s, Walt Disney began designing Disneyland. The opening day decor and attractions were both fun and timeless.
What kind of paper do I need to use?
Different kinds of paper could be used, as long as it is thicker paper that will stand up on its own. This project won’t work as well with flimsy printer paper.
For my version of this project, I used card stock and crafting paper.
How big does each letter need to be?
Here are the measurements for my Disneyland marquee sign:
- D – 12″ x 7.5″
- i – 10 1/4″ x 3″
- s – 7 1/2″ x 4 1/2″
- n – 7 1/2″ x 5″
- e – 7 1/2″ x 4 1/2″
- y – 9 1/2″ x 5 1/4″
- l – 11″ x 3 1/4″
- a – 7 1/2″ x 5″
- n – 7 1/2″ x 5″
- d – 10 1/2″ x 5 1/2″
- Yellow – 11″ x 6 1/2″
- Green – 7 3/4″ x 5 1/4″
- Orange – 9 3/4″ x 5″
- Hot Pink – 9 1/2″ x 4 1/4″
- Purple – 9″ x 3 1/2″
- Blue – 10″ x 4″
- Red (x3) – 2 1/2″ x 1 1/2″
This sign measures about 53″ in width. If you would like a bigger or smaller sign, the measurements are customizable with a little bit of math.
Can I use vinyl letters instead of tracing them?
Yes, of course. Because Disneyland’s font is custom made, you will need to buy a compatible font for a vinyl lettering machine like Cricut. But it can definitely be done this way.
I used the templates and traced them with sharpies because they are household items that more people would have access to.
Can I use a yard stick to back the paper?
You can use a yard stick, however we custom cut a piece of wood to make the sign slightly larger.
If you would like to use a yard stick, just be sure to bring down the measurements for all of the paper so they will fit accordingly.
How to Make Your Own Disneyland Marquee Sign
Here’s what you’ll need:
- White card stock
- Colored construction paper or crafting paper
- Custom cut piece of wood (2 1/2″ x 53″)
- Pencil
- Regular-sized Sharpies
- Jumbo Sharpies
- Scissors or a paper trimmer
- Masking tape
- Popsicle Sticks
- Printer
Instructions
- Print the templates according to their dimension. (If you prefer a bigger or smaller sign, size the templates up or down before printing).
- Cut out the template letters
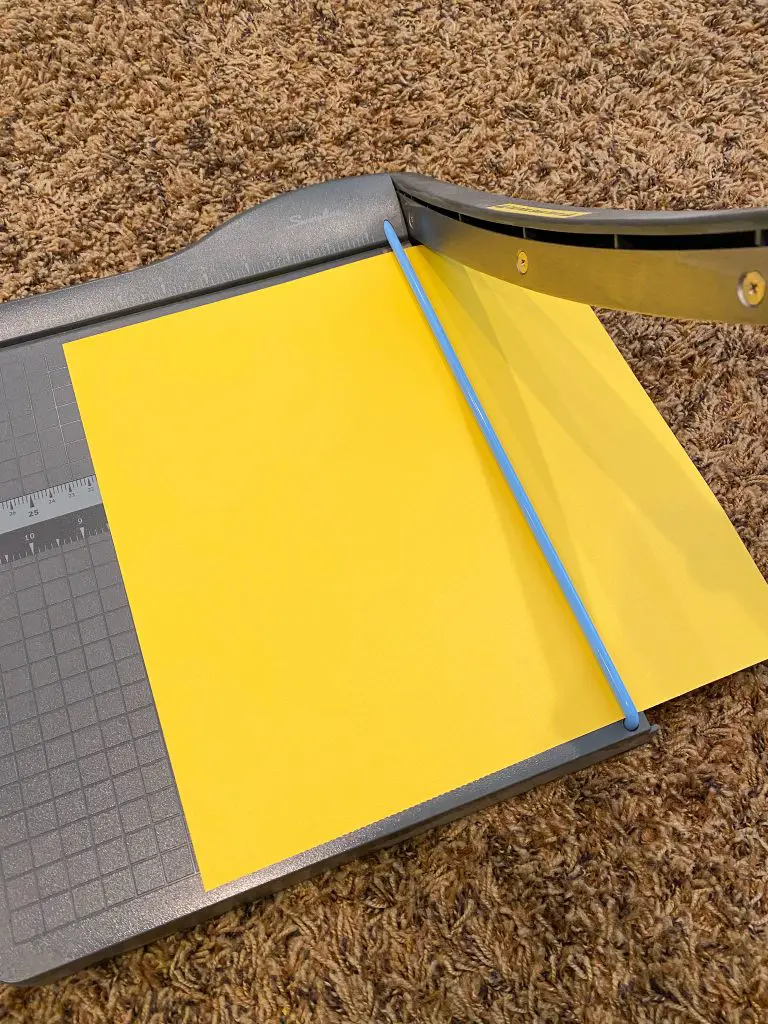
- Cut the white paper and colored paper to dimensions listed above
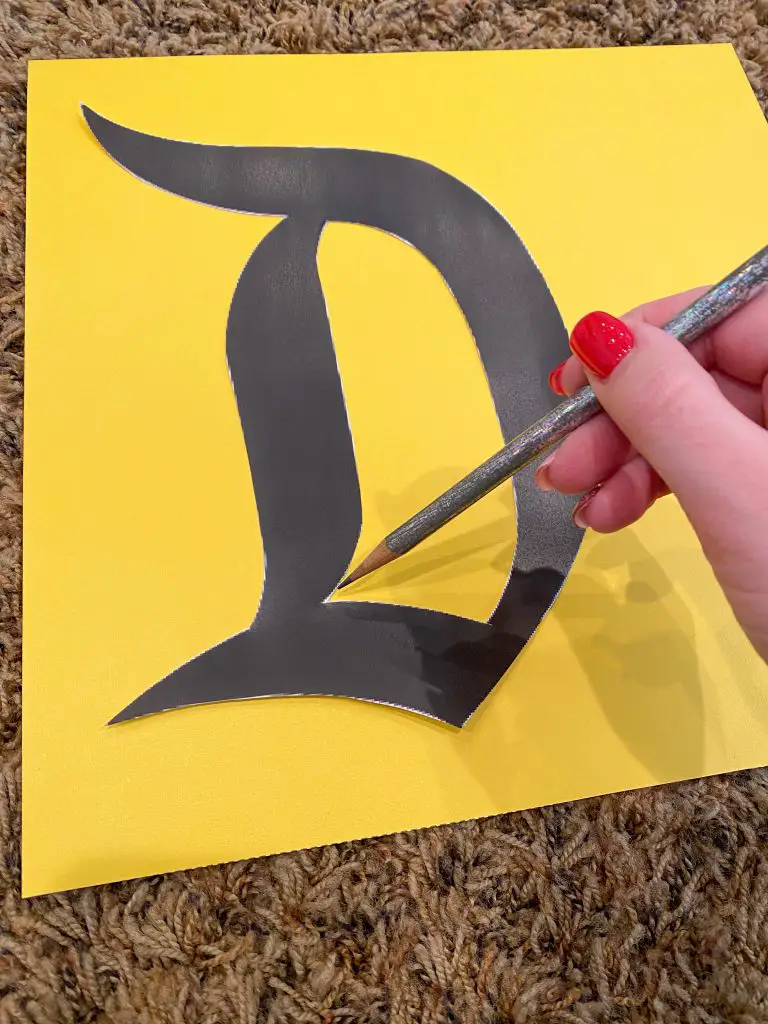
- Trace template letters onto cut white paper with pencil
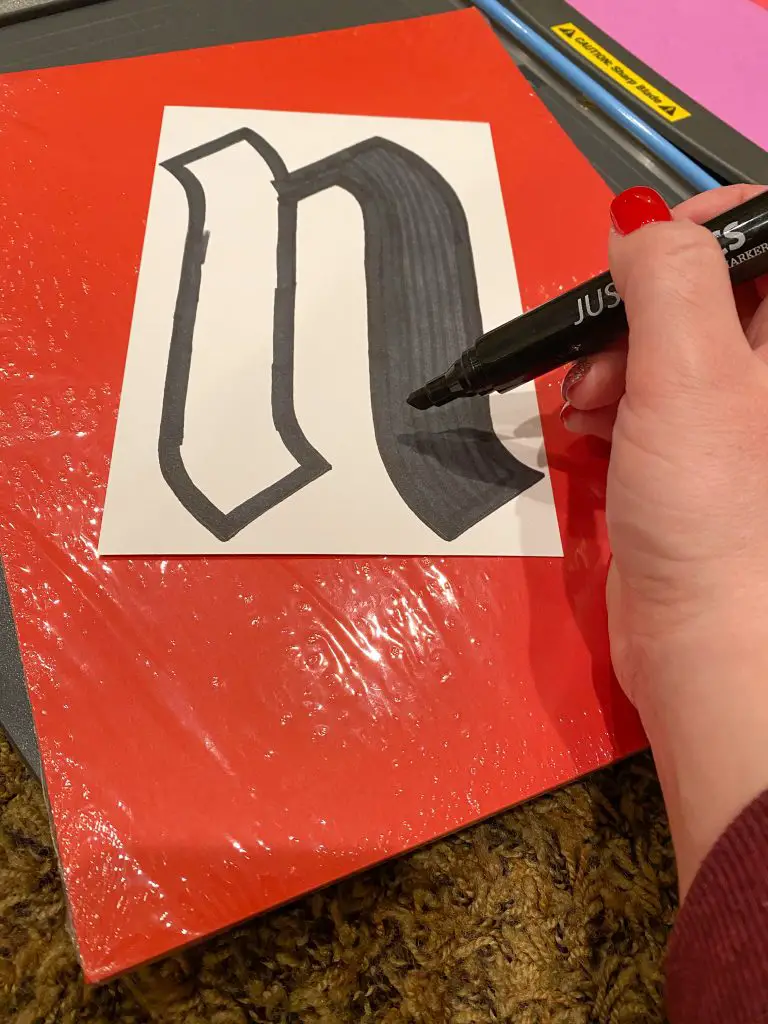
- Go over traced letter outlines with regular-sized Sharpie, then fill in the center with jumbo Sharpie
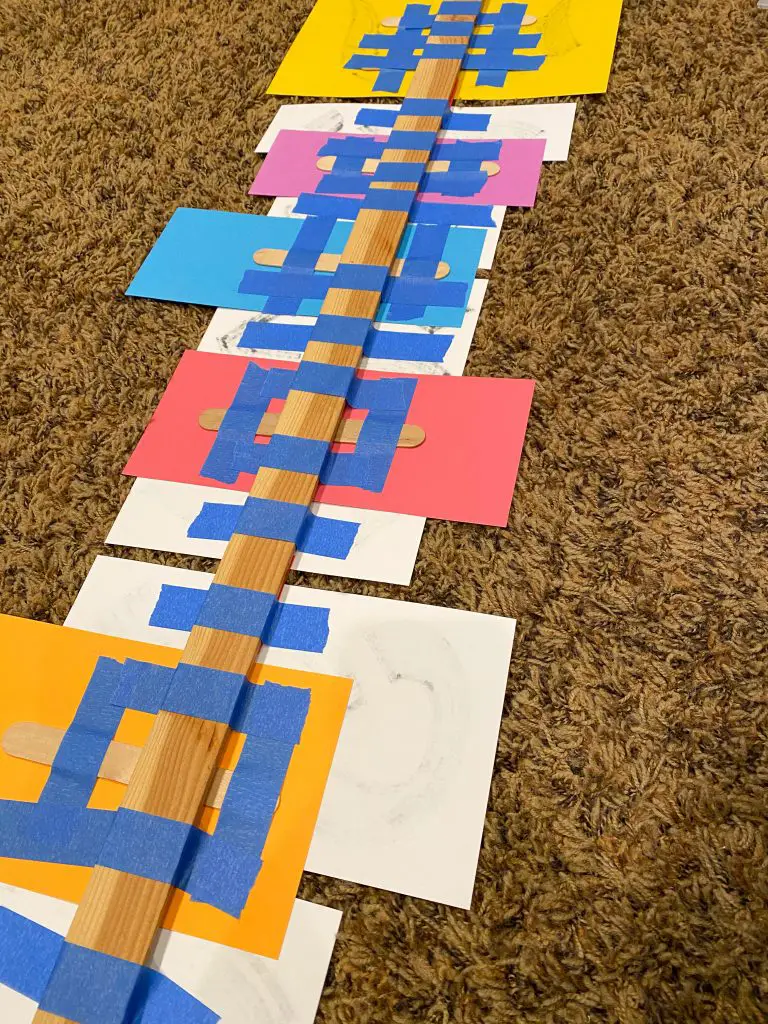
- Line up the letters face down, according to your preference or the design shown above
- Place the custom cut piece of wood along the back of the papers
- Using popsicle sticks, line up the wood and the sticks for extra support
- Tape popsicle sticks down and secure papers to wood
- Attach to the wall with nails, hooks, or command strips
DIY Disneyland Marquee Sign
Materials
- White card stock
- Colored construction paper or crafting paper
- Custom cut piece of wood (2 1/2″ x 53″)
- Pencil
- Masking tape
- Popsicle Sticks
Tools
- Regular-sized Sharpies
- Jumbo Sharpies
- Scissors or a paper trimmer
- Printer
Instructions
Print the templates according to their dimension. (If you prefer a bigger or smaller sign, size the templates up or down before printing).
Cut out the template letters
Cut the white paper and colored paper to dimensions listed above
Trace template letters onto cut white paper with pencil
Go over traced letter outlines with regular-sized Sharpie, then fill in the center with jumbo Sharpie
Line up the letters face down, according to your preference or the design shown above
Place the custom cut piece of wood along the back of the papers
Using popsicle sticks, line up the wood and the sticks for extra support
Tape popsicle sticks down and secure papers to wood
Attach to the wall with nails, hooks, or command strips