DIY Disney Painted Water Bottle
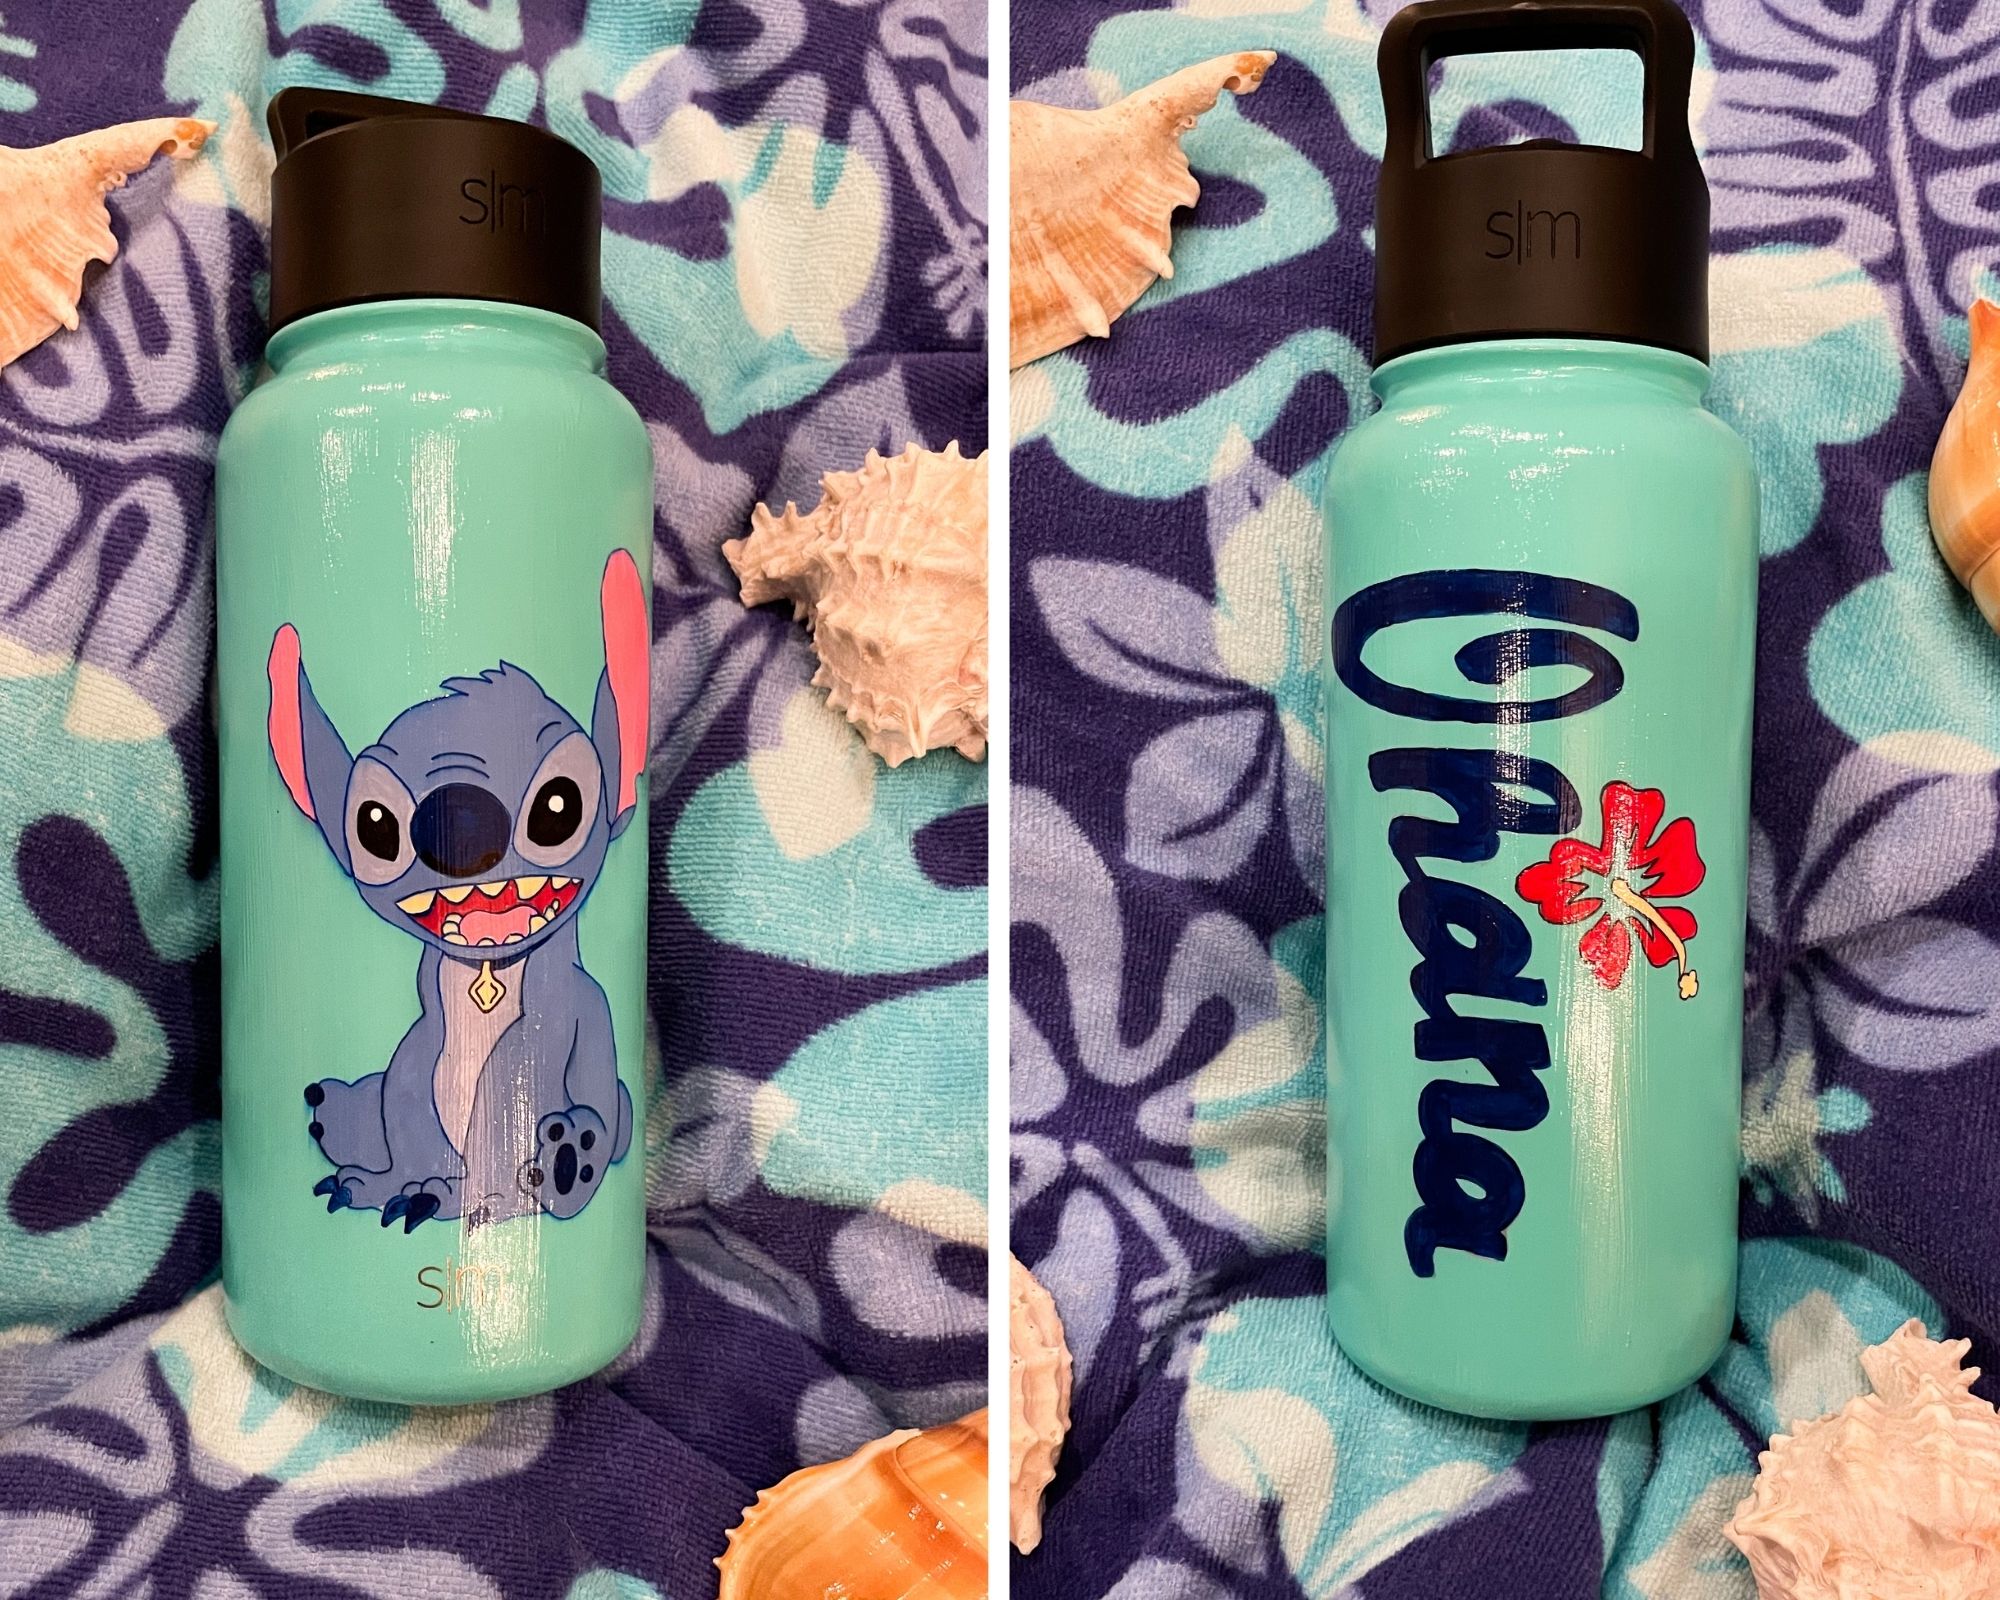
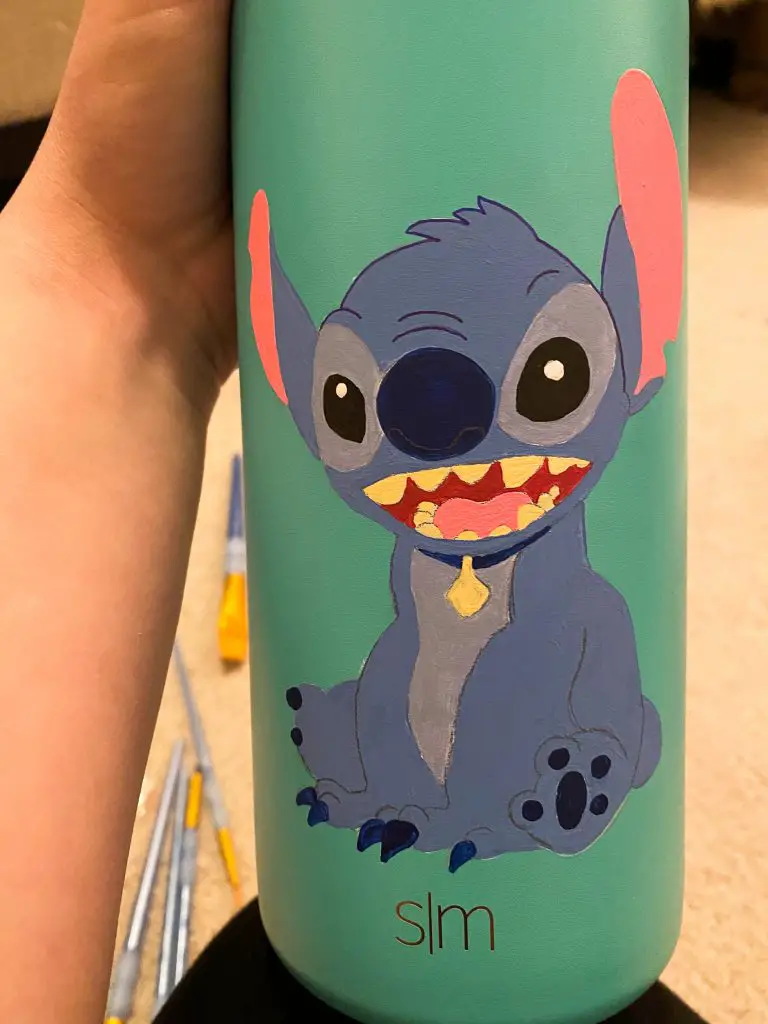
Stitch, the lovable alien from Disney’s Lilo & Stitch has become a fan favorite over the years with his cute design and unique personality.
In this project, I wanted to bring Stitch’s design and one of the movie’s biggest concepts – Ohana – together.

Painting water bottles has become a trending craft in the last few years. We all need to drink water, and personalizing your water bottle makes a mundane health requirement even more fun.
Where can I buy the right water bottle?
You can paint pretty much any water bottle you want to. However, it does make it easier if the finish on the bottle is a little more course. If there is already a glossy finish on the bottle, the harder it will be for the paint to stick.
I found this bottle at target. But you could get a water bottle from any store that sells them. The bottle you end up buying could depend on size, type, and color.
Do I need to use a primer on the water bottle before I paint it?
I learned by trial and error that primer is definitely the way to go. I tried to do a layer of white paint before adding color, only to have it rub off completely when I tried to add a second coat.
So I washed the bottle off and tried again. I painted a coat of primer on, and that did the trick. Any primer will work, but more specifically a primer used for acrylic paints that you could find at a craft store.
What kind of paint should I use?
Once I added the primer, I used regular acrylic paints that you can find at craft stores or stores like Walmart and Target.
These paints are not very expensive. You can usually find 2 oz. bottles in various colors for anywhere from $0.50 to $1.
What kind of glaze or seal should I use?
If you have experience with a certain type of glaze or finishing seal, feel free to use that.
I used Mod Podge because it is very user friendly and easy to work with. It doesn’t take much to give the project a good, finished look.
It can be a little scary looking when you first put it on because it goes on with a white color, similar to Elmer’s glue. But never fear! It always dries clear, no matter how much you put on.
However, you may want to use a spray seal instead of painting it on if you don’t like a brushed look.
How to Make Your Own Painted Water Bottle
Here’s what you’ll need:
- Water Bottle or Hydro Flask in your desired color
- Paint primer
- Acrylic Paints in your desired colors
- Paintbrushes
- Mod Podge
- Pencil
- Thin-tipped Sharpie
- Printed Stencil
Instructions
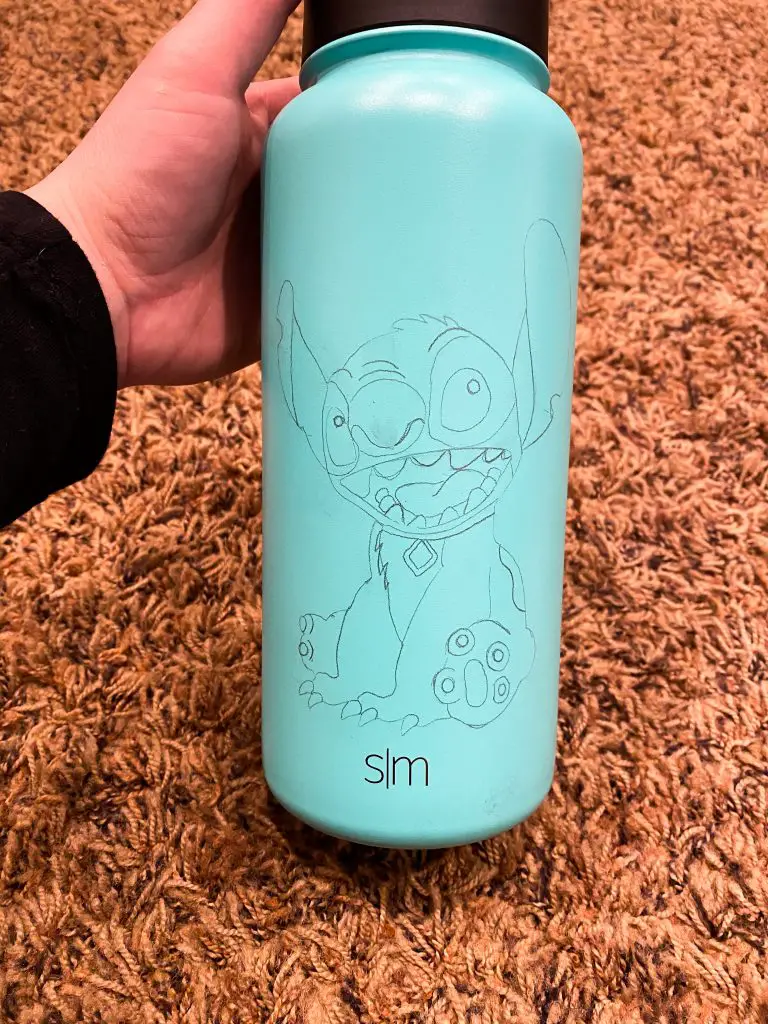
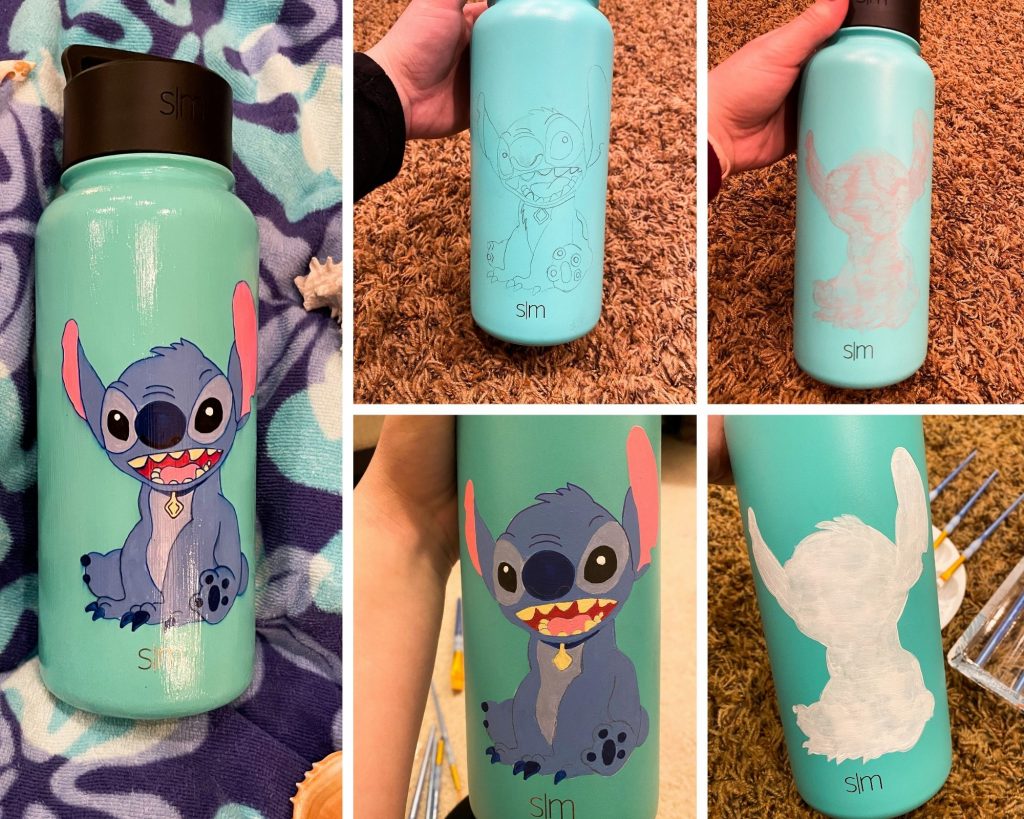
- Print the stencils you want according to the dimension of your chosen design or picture.
- Cut out the stencil sections to trace.
- Trace the outer edges of the stencil.
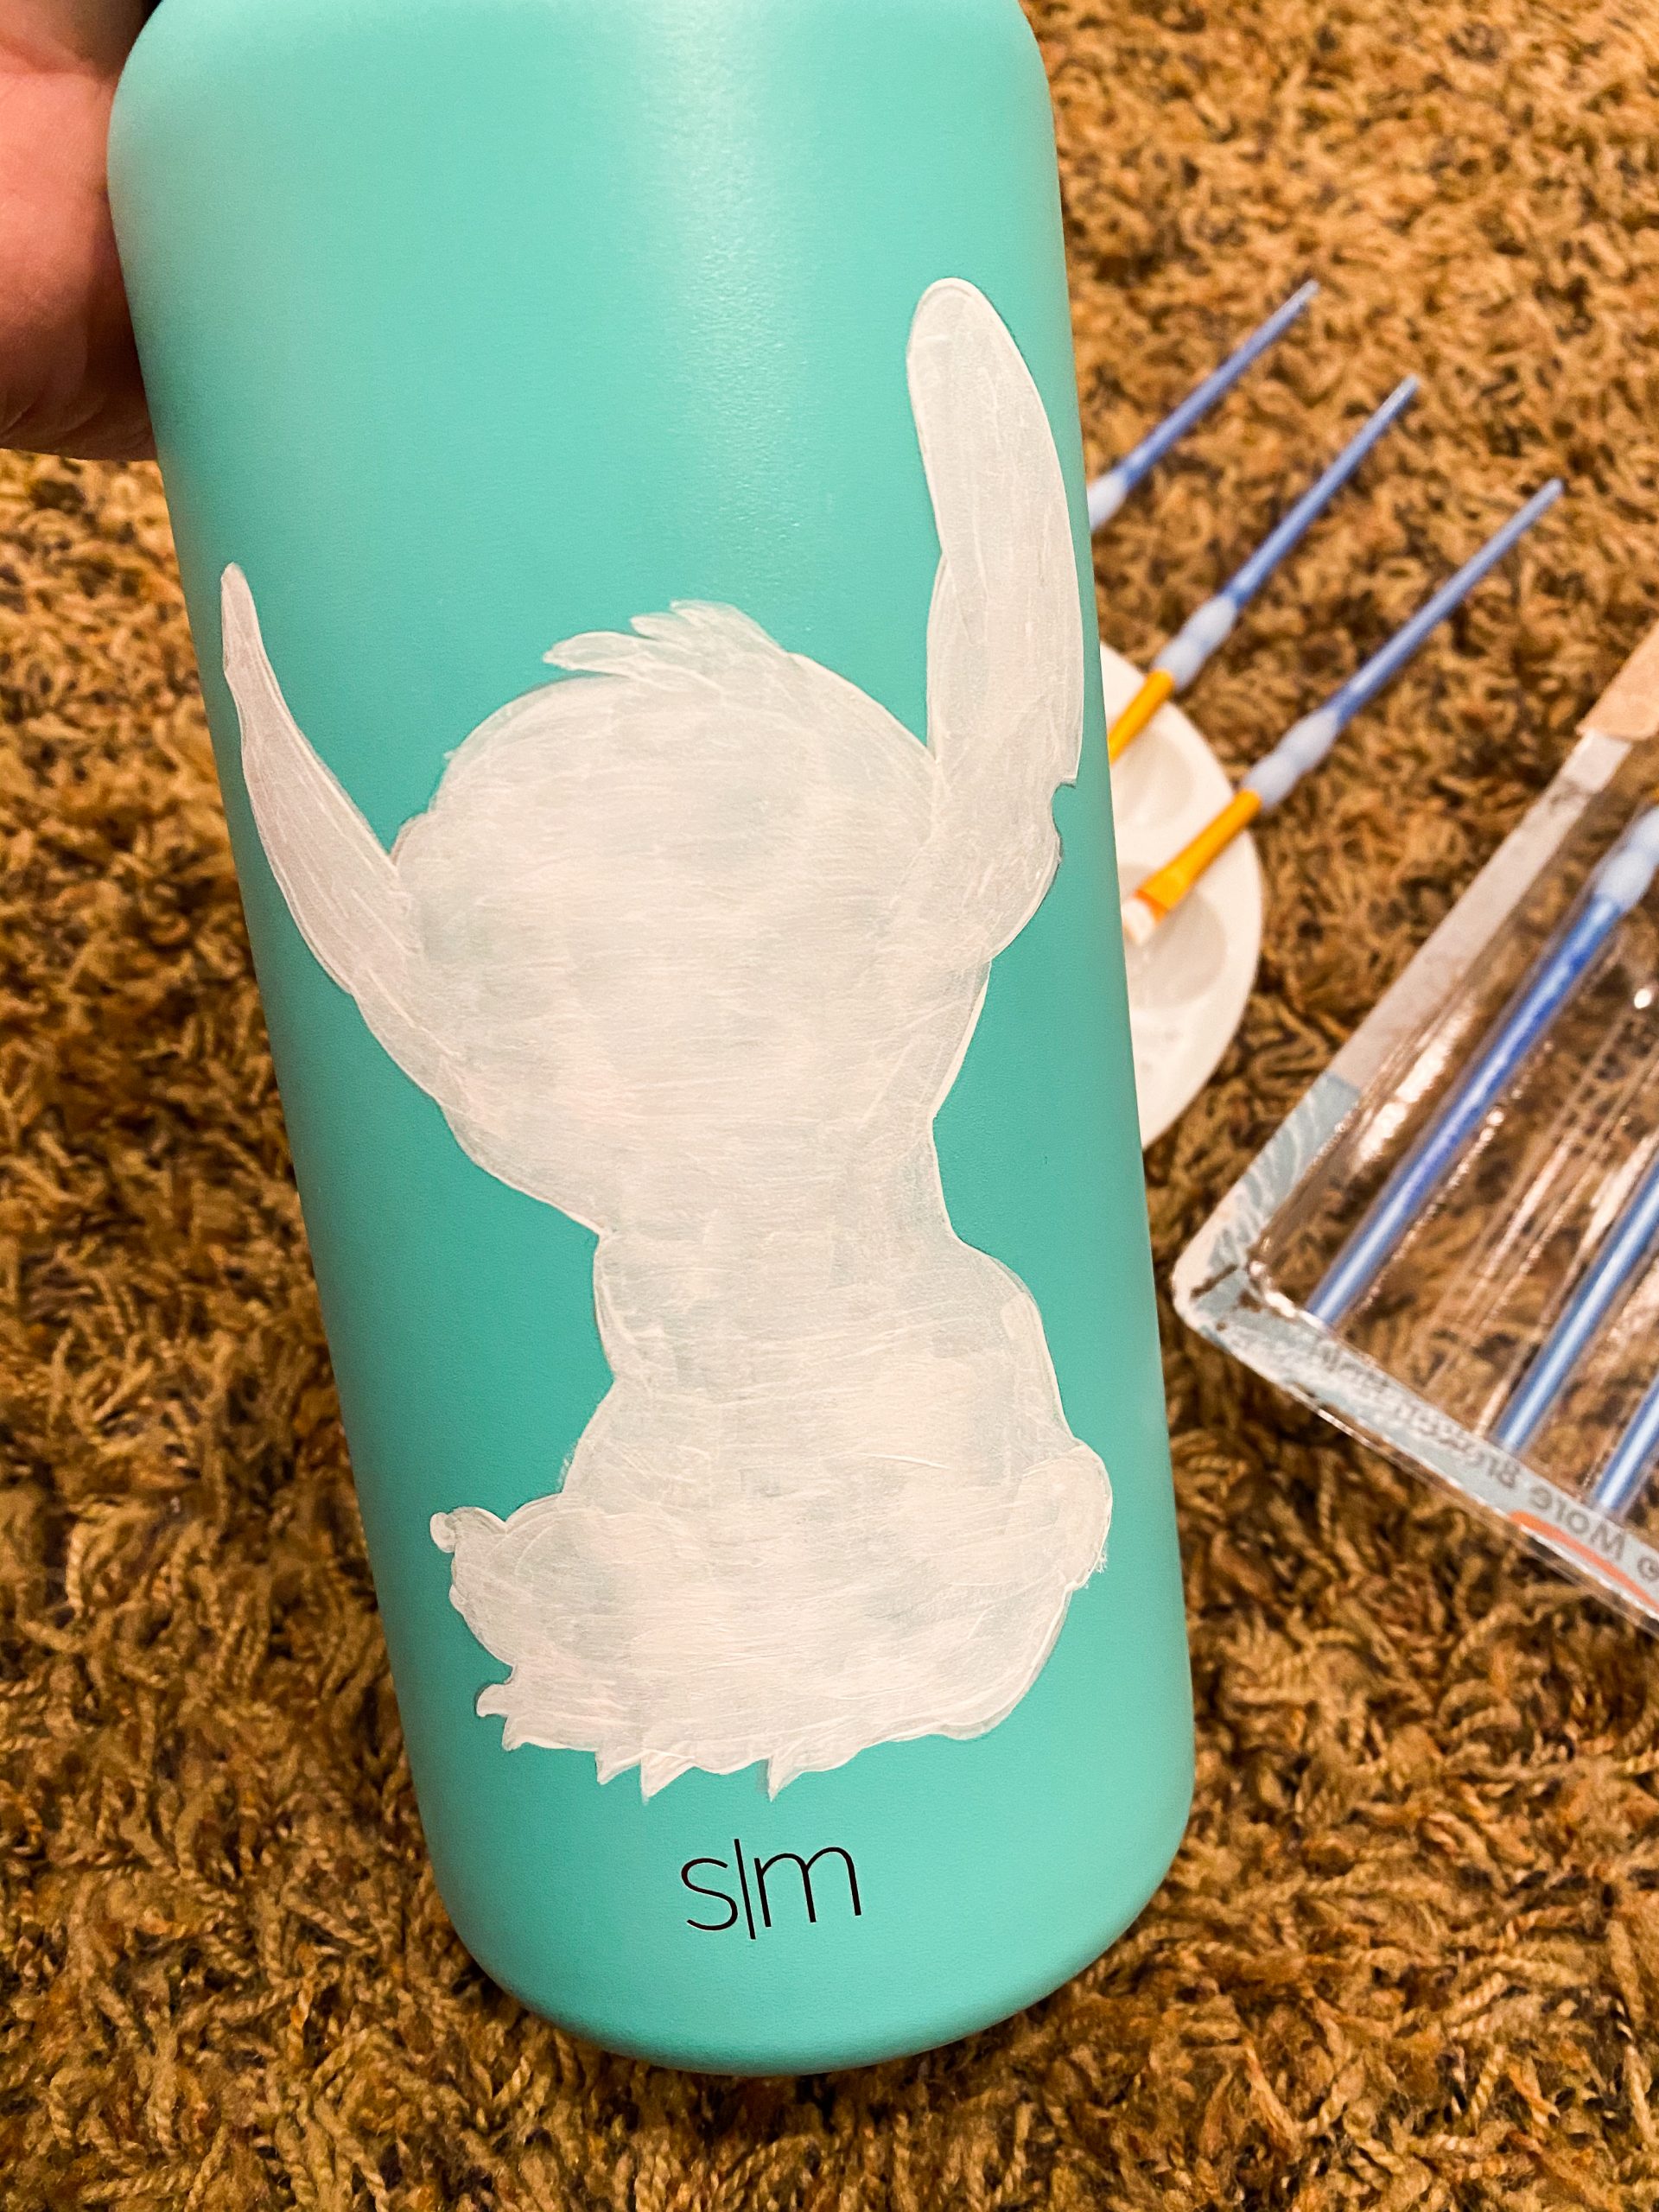
- When you are happy with the outer edges, fill in your design with primer.
- After the design is primed, trace the remainder of your stencil on top of the primer.
- When you are happy with the design on your bottle, break out those paintbrushes and start with one color at a time. You want to make sure each color has time to dry before you start the next color or layer to avoid the paint bleeding together.
- When you have finished each color, you can decide whether you want another layer of paint and add any finishing touches you would like to at this time.
- If there are any lines that are too thin to paint, take the thin-tipped Sharpie and go over them for a more clean look.
- Allow the paint and Sharpie to dry for at least 2-3 hours.
- Take a paintbrush and paint on Mod Podge in smooth, even strokes.
- Allow Mod Podge to dry for 1-3 hours. A warmer room temperature will result in faster drying time.
DIY Painted Water Bottle

In this DIY project, you can bring Stitch's design and one of the movie's biggest concepts - Ohana - together.
This design is only one concept. If you have another color or character in mind, this project is adaptable.
Materials
- Water Bottle or Hydro Flask in your desired color
- Paint primer
- Acrylic Paints in your desired colors
- Paintbrushes
- Mod Podge
- Pencil
- Thin-tipped Sharpie
- Printed Stencil
Tools
- Paint
- Paintbrushes
- Water Bottle
- Primer
Instructions
1. Print the stencils you want according to the dimension of your chosen design or picture.
2. Cut out the stencil sections to trace.
3. Trace the outer edges of the stencil.
4. When you are happy with the outer edges, fill in your design with primer.
5. After the design is primed, trace the remainder of your stencil on top of the primer.
6. When you are happy with the design on your bottle, break out those paintbrushes and start with one color at a time. You want to make sure each color has time to dry before you start the next color or layer to avoid the paint bleeding together.
7. When you have finished each color, you can decide whether you want another layer of paint and add any finishing touches you would like to at this time.
8. If there are any lines that are too thin to paint, take the thin-tipped Sharpie and go over them for a more clean look.
9. Allow the paint and Sharpie to dry for at least 2-3 hours.
10. Take a paintbrush and paint on Mod Podge in smooth, even strokes.
11. Allow Mod Podge to dry for 1-3 hours. A warmer room temperature will result in faster drying time.